Properly preparing your home before an exterminator visit is essential to ensure the process is effective, efficient, and safe. Taking a few proactive steps can maximize the treatment’s success and minimize any disruptions to your daily life.
1. Declutter Key Areas
Pests often hide in cluttered spaces, making it difficult for exterminators to access problem areas. Ensure that key areas of your home are organized and free of unnecessary items:
– Kitchen: Remove items from countertops, clear the area beneath sinks, and consider pulling out movable appliances like stoves or refrigerators to allow access.
– Bedrooms: Clear space under beds, organize closets, and remove items near walls where pests may enter or nest.
– Living Areas: Tidy up furniture arrangements to give exterminators better access to room corners, baseboards, and other potential pest entry points.
Decluttering not only helps provide better visibility but also ensures that treatments are applied where they’re most needed.
2. Deep Clean Target Areas
Cleaning your home before an exterminator visit helps eliminate food particles and pest attractants that might interfere with the treatment process:
– Sweep and mop all floors thoroughly.
– Vacuum carpets, rugs, and upholstered furniture to remove debris or hidden eggs from pests like fleas or bed bugs.
– Wipe down kitchen surfaces to remove crumbs or grease buildup.
Using a proper cleaning routine ensures treatments adhere effectively to treated surfaces without obstruction from dirt or grime layers.
3. Store Food Properly
Seal all food in airtight containers to avoid contamination during the extermination process:
| Type of Food item | Recommended Storage Solution |
|—————————-|————————————|
| Pantry goods (e.g., cereal) | Airtight plastic or glass containers |
| Fresh produce | Refrigerate tightly sealed |
| Open packages (e.g., snacks)| Store in Ziploc bags |
Additionally, remove pet food bowls during treatment hours and store them securely along with water dishes.
4. Provide Pest Location Information
Compile a detailed list of pest activity throughout your home including:
– Locations of droppings or nests you’ve observed. – Entry points like cracks in walls or windowsills. – Times when pests seem most active (daytime vs nighttime).
Sharing these observations with your exterminator helps target problem areas more effectively during their visit.
5. Secure Valuables
Though most professional exterminators operate with care around belongings valuables personal gadgets electronics etc)
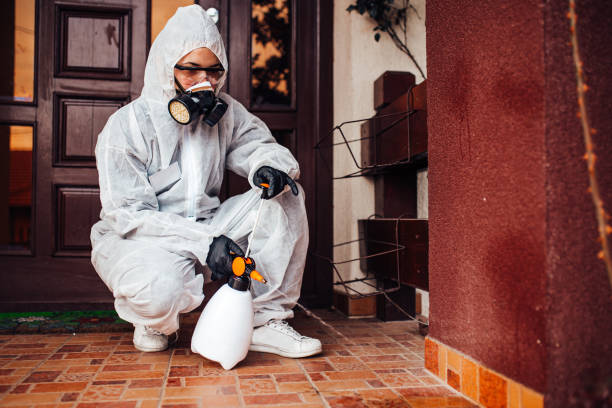
Steps to Take Before a Pest Control Company Miami Gardens FL Arrives to Maximize Results
Proper preparation plays a pivotal role in ensuring the success of an exterminator visit. By taking certain steps ahead of time, you can help the extermination process run smoothly and maximize effectiveness. Below are key actions to consider before your pest control professional arrives.
1. Declutter Target Areas
Pests often hide in cluttered spaces, so removing unnecessary items enables exterminators to access critical areas more easily. Focus on these tasks:
– Clear countertops and cupboards: Remove items from kitchen counters, cabinets, and pantry shelves where pests are frequently found.
– Tidy up floors and baseboards: Move furniture slightly away from walls, vacuum floors, and eliminate piles of paper or boxes that may harbor pests like cockroaches or ants.
– Declutter storage areas: Organize attics, closets, or basements to allow clear access for inspection and treatment.
2. Clean Your Home Thoroughly
Cleaning ensures that pest control chemicals bond more effectively with surfaces while also removing food particles that could attract pests after treatment:
– Sweep or vacuum floors thoroughly, including under furniture and appliances such as refrigerators or stoves.
– Wash dishes and ensure no food is left out on counters or tables. – Empty trash cans inside the home and securely seal any garbage bags before disposal.
3. Address Food and Water Sources
Eliminating access to food and water minimizes the chance of reinfestation after treatment: – Store all perishable foods in sealed containers during preparation. – Fix any plumbing leaks that may provide a water source for pests. – Avoid leaving pet food exposed; instead place it in airtight containers or temporarily store it away from treatment areas.
4. Protect Personal Belongings
To safeguard your belongings from contamination during extermination:
– Cover furniture, electronics, bedding, and other sensitive items with plastic sheets if necessary. – Store clothing securely in zipped garment bags or sealed plastic bins.
5. Communicate with Your Exterminator About Problem Areas
Your exterminator will need specific information about where pests have been seen so they can target their efforts effectively: | Information Examples | Why This Matters | |—————————–|—————————–| | Locations of pest activity | Helps identify nesting areas | | Type of pest (if known) | Determines appropriate treatment methods | | Frequency of sightings | Indicates infestation severity |
Documenting these details ahead of time ensures clarity when discussing issues with your exterminator.
6. Plan for Temporary Relocation (If Necessary)
Depending on the type of treatment being applied (e.g., fumigation), you may need to vacate your home temporarily: – Ask how long you should stay out after treatment is completed. – Bring essential items like medications if relocation is required. – Make arrangements for pets, young children, or individuals with respiratory conditions who may need additional precautions.
By following these steps carefully before your scheduled appointment, you’ll set the stage for a more effective and efficient extermination process while minimizing future infestations within your space.
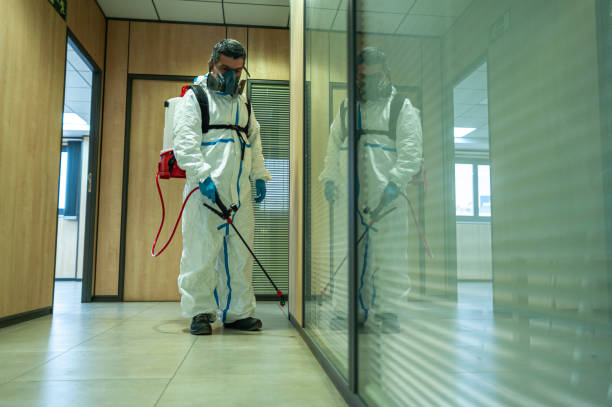
Essential Preparations with an Exterminator Miami Gardens FL for a Successful Extermination Process
Clear Access to Problem Areas
- Empty out cabinets, drawers, and shelves where pests such as cockroaches or ants might hide.
- Wipe down surfaces to remove food crumbs or stains that may attract more pests.
- Remove items from under sinks and around drains where moisture-loving pests like silverfish or centipedes might dwell.
- Move furniture a few inches away from walls so exterminators can inspect baseboards, corners, and edges thoroughly.
Launder Soft Fabrics Where Pests May Hide
- Blankets, sheets, pillows, and pillowcases.
- Curtains or drapes near infested areas.
- Pet bedding that may harbor fleas.
For additional protection, place cleaned items in sealed plastic bags until after the extermination process is completed.
Reduce Clutter in Affected Areas
- Remove stacks of paper, cardboard boxes, and unnecessary storage containers from rooms where infestation has been observed.
- Store items in sealed plastic bins rather than open boxes to prevent reinfestation.
Organizing these areas makes it easier for exterminators to identify pest activity.
Temporarily Store Food Items Safely
- Place all perishable goods (fruits, vegetables) inside refrigerators or sealed containers.
- Transfer dry pantry items like flour or grains into airtight jars if they are stored in infested locations.
- Remove pet food bowls during treatment sessions.
Vacuum Thoroughly Before Extermination
Vacuuming affected rooms prior to exterminator treatments serves two purposes: it reduces active infestations by removing visible pests and clears dust buildup for better pesticide adhesion.
| Area | Reason |
| Carpet edges | Common hiding place for bed bugs/fleas |
| Behind/under furniture | Spaces often overlooked during daily cleaning |
| Cracks along floorboards | Potential entry points for insects |
Dispose of vacuum contents immediately after cleaning by sealing them in a plastic bag before discarding.
Communicate Key Details with Your Exterminator
- List specific areas where pest activity has been observed (e.g., kitchen counters, attic corners).
- Share any previous pest control attempts you’ve undertaken (e.g., traps or over-the-counter sprays).
Keeping lines of communication open ensures effective targeting of problem zones.
By following these preparation steps carefully, you will create an environment conducive to successful pest removal while reducing risks post-treatment.
Important Questions to Ask About Miami Gardens Pest Removal Before Getting Started
When working with an exterminator, asking the right questions is crucial to ensure a thorough and effective pest control process. Below are important questions to consider asking prior to the start of the service. These inquiries will help you understand the scope of work, safety precautions, and set clear expectations.
1. What Types of Products Will Be Used?
Understanding the chemicals or treatment methods used during pest control is essential, especially if anyone in your household has sensitivities or allergies. Some key details to ask about include:
– Are the products eco-friendly or organic?
– Are they safe for pets and children?
– How long should humans and animals stay away from treated areas?
2. What Pests Are Being Targeted Specifically?
Different pests require tailored approaches for elimination. Confirm with your exterminator which pests they plan to address during their visit:
– Are they targeting only visible pests or potential infestations as well?
– Will they conduct a thorough inspection for hidden infestations?
3. Is This Treatment a One-Time Service or Part of an Ongoing Program?
Depending on the severity of infestation, you may need multiple visits from your exterminator. It’s helpful to understand:
– Whether this is a single treatment or part of a recurring schedule.
– If follow-up visits are necessary, how often will they occur, and are they included in the initial cost?
| Treatment Type | Description | Timeline Recommendation | Cost Considerations |
| One-Time Treatment | Suitable for minor infestations | Immediate | May be higher per visit |
| Ongoing Program | Best for recurring pest problems | Monthly/Quarterly | More cost-efficient over time |
4. What Can I Do After the Visit to Prevent Future Infestations?
A professional exterminator often provides advice on maintaining pest-free conditions at home after their work is done. Ask about preventive measures such as:
– Sealing cracks or gaps where pests may enter your home.
– Proper food storage techniques to avoid attracting pests.
– Best cleaning practices to deter reinfestation.
5. How Long Before Results Are Visible?
While some treatments show immediate effects, others may take days or weeks before you notice results depending on the targeted pest type and method used: – When can I expect full results? – Is it normal for pest activity to temporarily increase after treatment?
6. Do You Offer Any Guarantees or Warranties?
Having assurance regarding the effectiveness of services can provide peace of mind: – Do you offer any guarantees if issues persist after treatment? – Is there an additional charge for follow-up visits if pests return within a specific period?
7. Are You Licensed and Insured?
Pest control professionals should meet industry standards for legal operation: – Can you provide proof of licensing in this state/region? – Does your insurance cover accidental damage during treatments?
By asking these key questions before beginning an extermination process, you’ll not only gain clarity but also build confidence in your choice of professional services while ensuring maximum safety and effectiveness throughout each step.
How Noting Pest Locations Enhances Pest Control Service Miami Gardens FL
Properly identifying and noting pest locations in your home is a critical step in ensuring the success of any extermination process. By providing your exterminator with detailed information, you can help them address the infestation more efficiently and target specific areas that require the most attention. Here’s why this step matters and how you can do it effectively.
Benefits of Noting Pest Locations
- Targeted Treatment: Pinpointing areas where pests are most active allows the exterminator to focus treatment efforts, reducing the overall time and resources needed for eradication.
- Improved Effectiveness: Specific data about pest behavior or nesting spots ensures that treatments reach the source of the problem rather than just treating symptoms.
- Prevention of Reinfestation: Identifying where pests enter or hide can help implement preventive measures to block their return after extermination.
- Cost Efficiency: Efficient targeting minimizes wasted products and unnecessary treatments, potentially lowering costs associated with pest control services.
How to Note Pest Locations
- Observe Problem Areas
Track any signs of pests, such as droppings, chew marks, nests, or live sightings. Pay close attention to areas like kitchens (especially around food storage), bathrooms, basements, and attics as these spaces are often prone to infestations. - Track Patterns and Behavior
If possible, note times when pests appear more frequently (day vs. night) or specific behaviors (e.g., scurrying along walls). This detailed information helps determine what type of treatment may work best. - Inspect Entry Points
Check common access points for pests around windows, doors, vents, plumbing lines, or cracks in walls. Seal minor gaps temporarily until professional action can be taken. - Document Your Findings
Use a notebook or digital tool to record your observations clearly:
| Observation | Details |
| Pest Type | Ants |
| Location | Kitchen counter near sink |
| Time Spotted | Evening hours |
| Activity | Moving toward food crumbs |
- Take Photos if Possible
Capture images of affected areas or pests if you’re able to safely do so without disturbing them further.
Communicating with Your Exterminator
- Share all notes and photos regarding pest sightings.
- Highlight specific rooms or zones where activity has been observed.
- Discuss patterns you’ve noticed (e.g., increased movement at night).
This collaboration ensures that no critical details are missed during the assessment phase.
Common Areas Where Pests May Hide
| Area | Pests Commonly Found |
| Kitchen Cabinets | Cockroaches & Ants |
| Behind Appliances | Rodents & Roaches |
| Attics | Squirrels & Wasps |
| Bathroom Pipes | Silverfish & Drain Flies |
Taking a proactive approach by noting these potential hotspots will greatly enhance the effectiveness of any extermination plan while expediting long-term solutions against infestations.
Why Noting Pest Locations is Crucial for Effective Extermination
When dealing with a pest infestation, one of the most critical steps you can take before an exterminator arrives is noting the specific locations where pests have been seen. This information can significantly impact the success of the extermination process. Below, we’ll discuss why identifying these areas matters and how you can effectively do it.
Benefits of Noting Pest Locations
- Targeted Treatment: By providing your exterminator with details about where pests are most active, they can focus their efforts on these high-priority areas. This ensures a more efficient use of pest control methods and resources.
- Accurate Identification: Pests often leave behind signs like droppings, nests, or damage to wood and fabric. Documenting where you find these signs allows the exterminator to identify the type of pest accurately and select the appropriate treatment method.
- Prevention of Spread: Knowing where pests tend to congregate helps prevent them from spreading to other areas of your home by allowing the exterminator to create an effective containment plan.
Tips for Tracking Pest Activity
- Inspect Frequently Used Areas: Check spaces like kitchens, bathrooms, basements, and attics as these are common entry points or nesting spots for pests such as rodents or insects.
- Look for Patterns: Pay attention to times when pests are most active—whether it’s during the night for cockroaches or early morning for ants—and note those observations.
- Document Signs of Activity: Use a notebook or smartphone notes app to jot down details such as droppings, chew marks, grease trails (for rodents), or live sightings.
- Use Sticky Traps (Optional): Place sticky traps in suspected areas—this can help confirm pest presence and give additional information about their population size.
- Check Hidden Areas: Don’t forget spaces behind appliances, under furniture, inside closets, or along baseboards.
Example Table for Tracking Pest Activity
| Date | Room/Location | Type of Pest Observed | Evidence Found | Time Frame Seen |
| 10/25/2023 | Kitchen pantry | Ants | Small trail near sugar jar | Afternoon |
| 10/26/2023 | Bathroom cabinet | Cockroach | Droppings in corner | Late evening |
| 10/27/2023 | Basement storage | Mice | Chewed box edges | Early morning |
Working With Your Exterminator
- Share any concerns about specific rooms or items that may require special attention.
- Clarify whether certain infestation sites may pose risks to children or pets so proper precautions can be taken.
By proactively documenting problem areas in advance of an extermination visit, you’re playing an essential role in ensuring both immediate results and long-term prevention strategies are effective.
- What to Expect from a Pest Control Company in Miami Gardens FL: Your Comprehensive Step-by-Step Guide
- The Ultimate Checklist for Cleaning After Miami Gardens FL Pest Control
- Step-by-Step Guide: How an Exterminator Miami Gardens FL Can Professionally Get Rid of Roaches
- How to Prepare Your Home for Miami Gardens FL Pest Control Services
- Understanding the Role of Miami Gardens FL Pest Control Experts and Why They’re Essential
- Comprehensive Guide to Choosing a Pest Control Company Miami Gardens FL for Expert Extermination Services
- How Property Owners in Miami Gardens FL Can Prepare for a Pest Control Company Treatment